
How to Backup File to AWS S3
Introduction
Amazon S3 is a simple storage service provided by Amazon Web Services. It provides APIs to store data as objects within buckets. An object is a file and any metadata that describes the file. AWS S3 is an ideal solution to store critical data and other files.
SnapShooter is a leading backup solution provider that makes it easy to schedule frequent backups for your servers, websites, and databases. SnapShooter creates backups and archives from your server and stores them in the cloud storage provider of your choice. It supports many cloud providers including, Amazon AWS, Google Cloud, Vultr, DropBox, Hetzner, UpCloud, and more.
In this post, we will show you how to backup files to Amazon S3.
Create an S3 Bucket in AWS
Before you can store any object or data in S3, you need to create a bucket on AWS S3. Follow the below steps to create a bucket on AWS S3:
Step 1 - Login to Amazon Management Console, search for S3 and open S3 service.
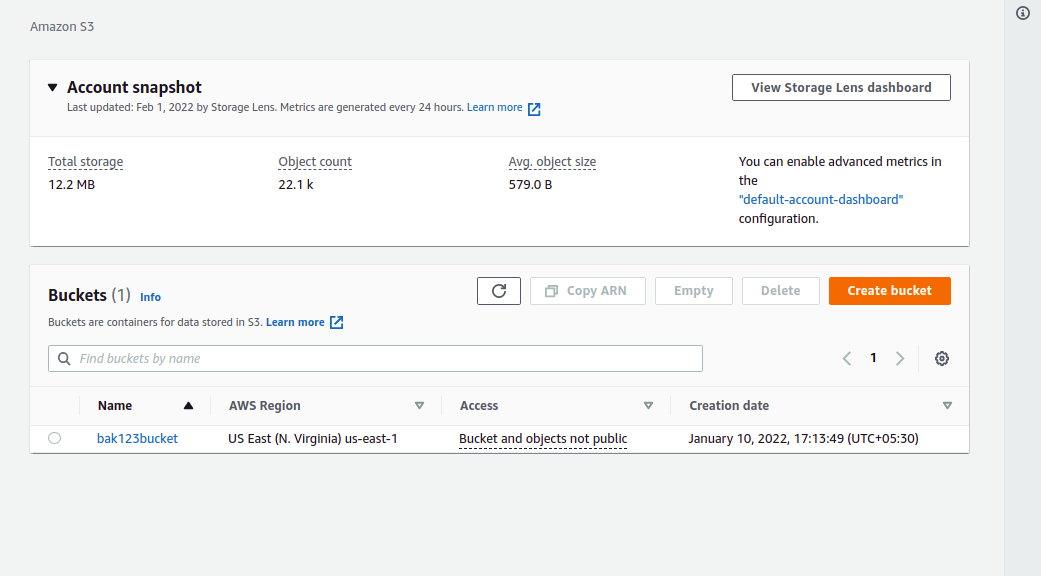
Step 2 - Click on Create bucket button. You should see the General configuration screen:
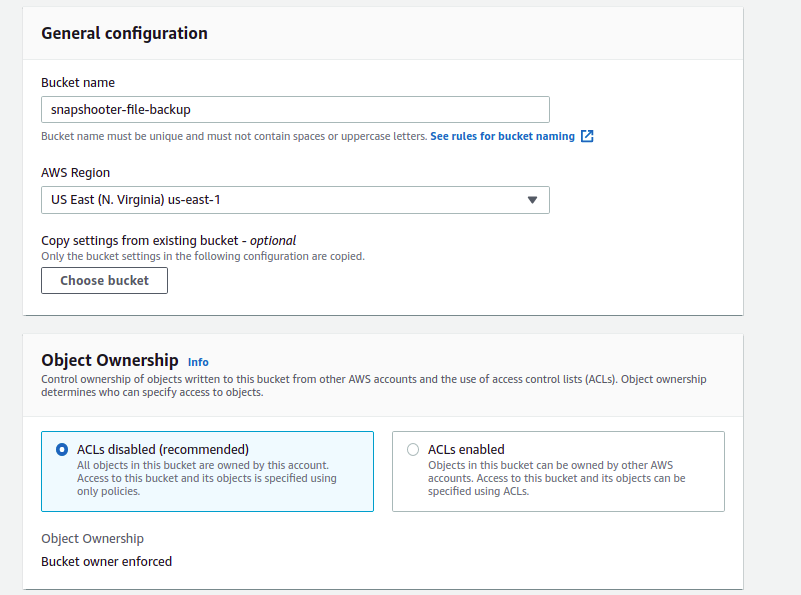
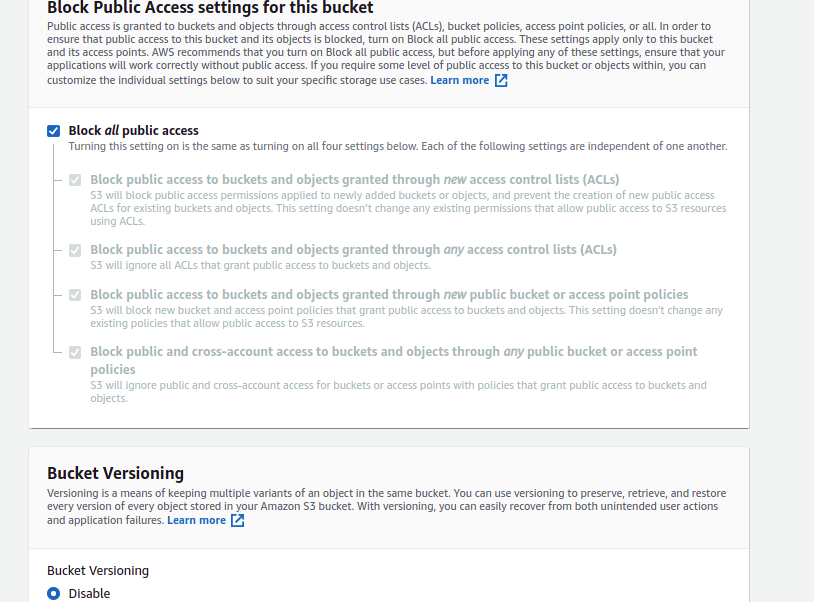

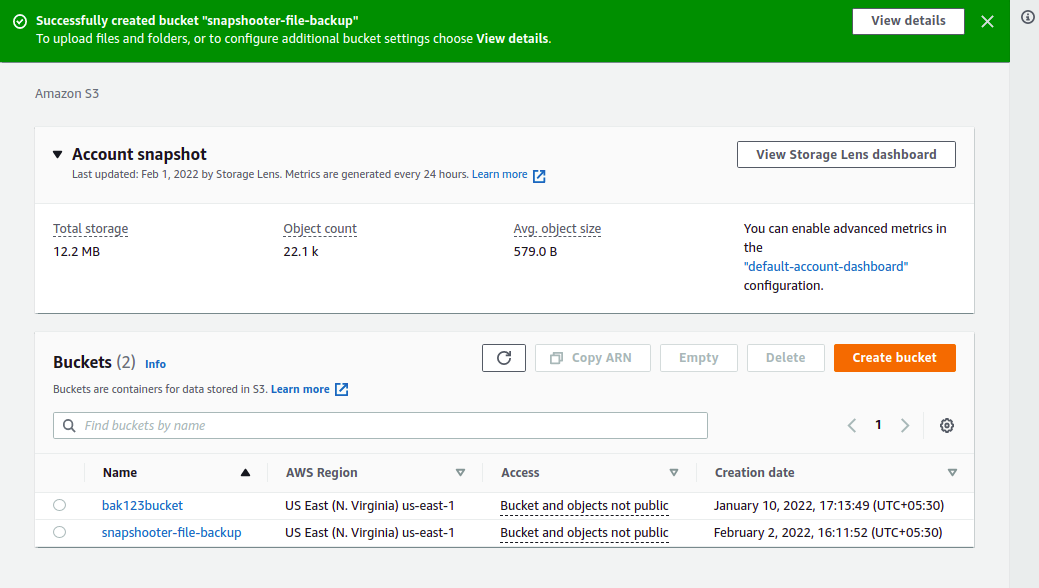
Step 3 - Type your bucket name, select your region, Select object ownership, Block all public access, and click on the Create bucket. Once the bucket is created, you will get the following screen:
Create a New IAM User
After creating an S3 bucket, you will need to create a new IAM user and assign permission for your S3 bucket. Follow the below steps to create an IAM user:
Step 1 - Leave S3, search for IAM from the top services menu, and click on Users on the left sidebar. You should see the IAM user screen:

Step 2 - Click on the Add users button to create a new IAM user. You should see the following screen:
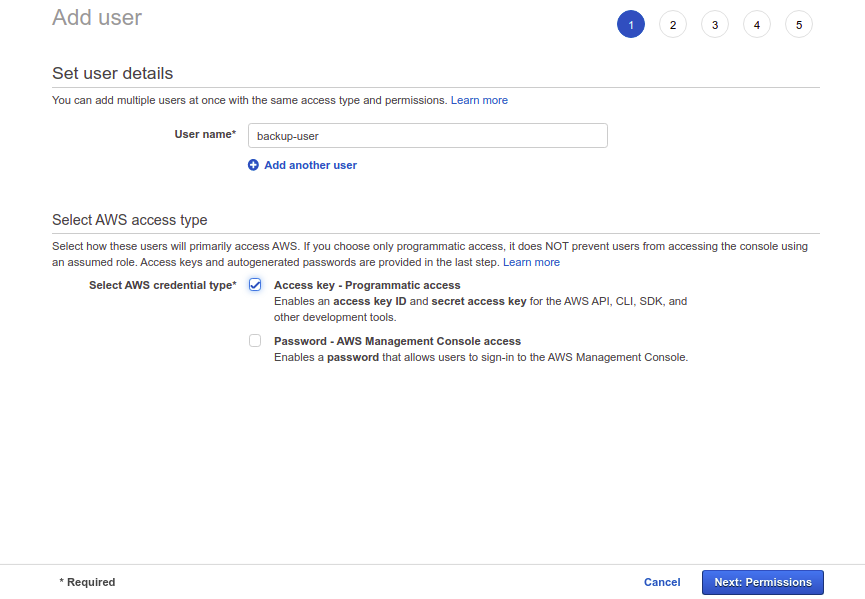
Step 3 - Type your username, select "Access Type Programmatic access", then click on the Next: Permissions:
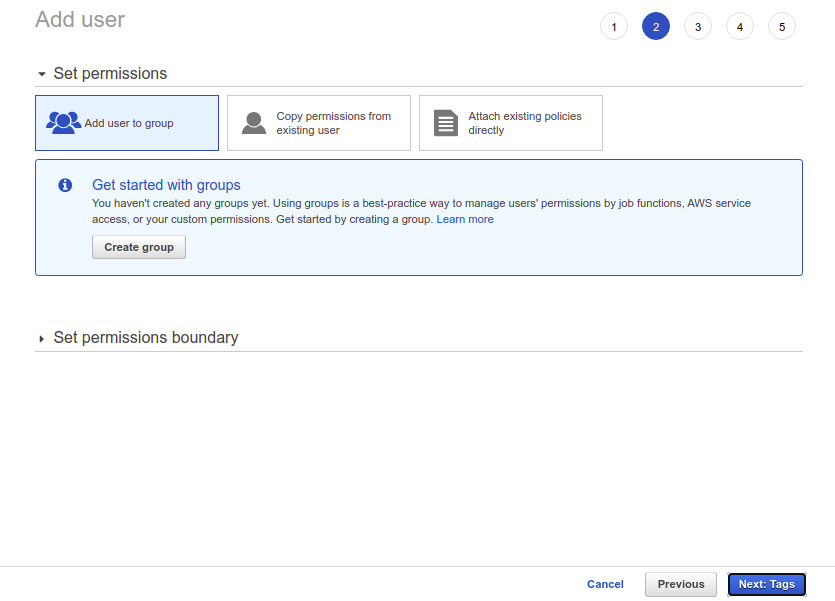
Step 4 - Leave all default options and click on the Next: Tags:
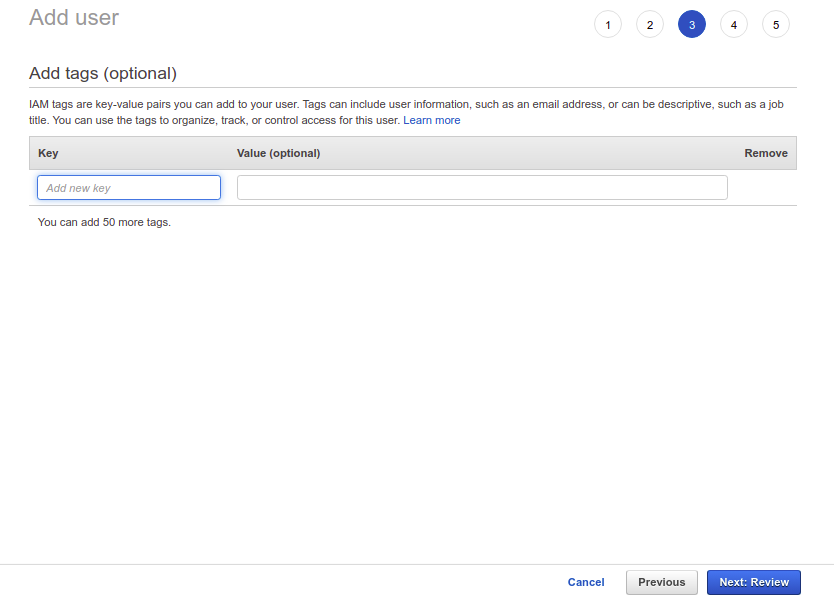
Step 5 - Leave all default options and click on the Next: Review:
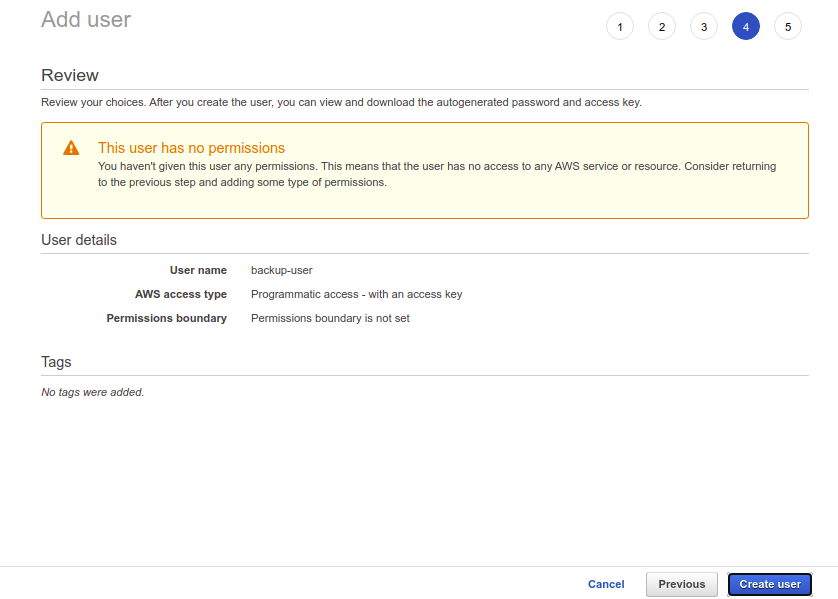
Step 6 - Review your configuration and click on the Create user button. You should see the following screen:

Step 7 - Note down the Access key ID and Secret access key in a safe location. You will need both keys to connect to the AWS S3 in the next step. Now, click on the Close button. You should see the following screen:
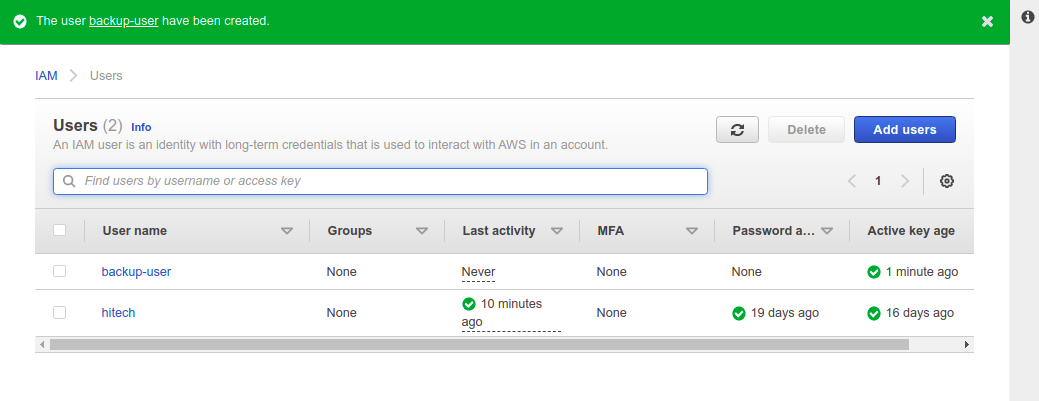
Step 8 - Click on your newly created user. You should see the following screen:
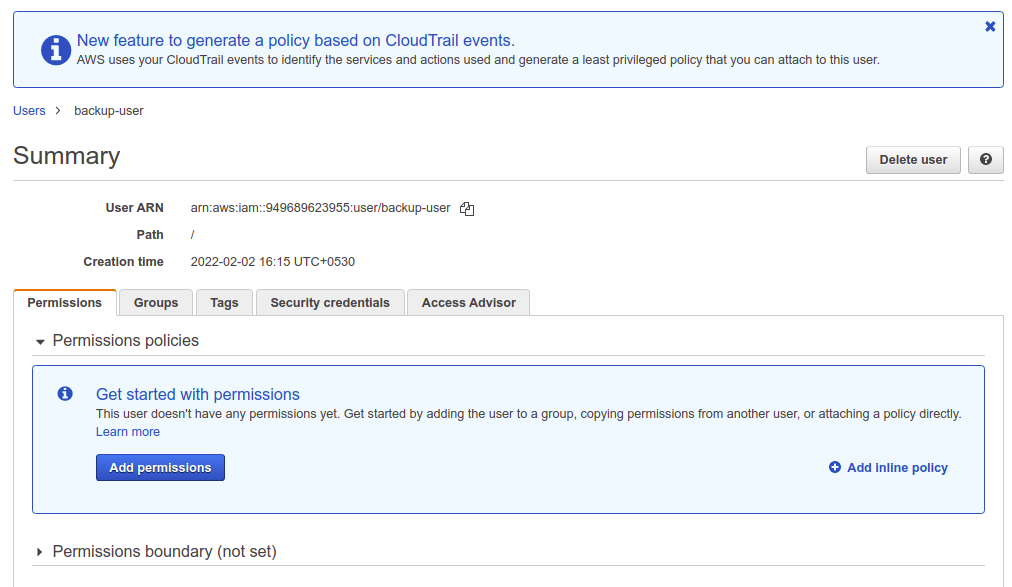
Step 9 - Click on Add inline policy. You should see the Create Policy screen:
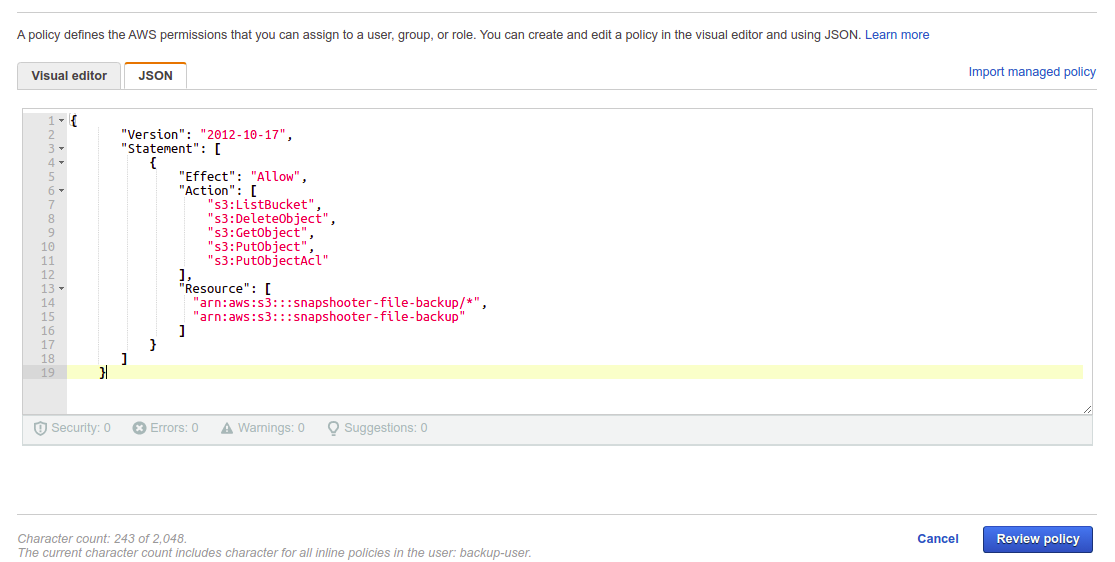
Step 10 - Choose JSON Editor and add the following contents:
{ "Version": "2012-10-17", "Statement": [ { "Effect": "Allow", "Action": [ "s3:ListBucket", "s3:DeleteObject", "s3:GetObject", "s3:PutObject", "s3:PutObjectAcl" ], "Resource": [ "arn:aws:s3:::snapshooter-file-backup/*", "arn:aws:s3:::snapshooter-file-backup" ] } ] }Step 11 - Replace the snapshooter-file-backup with the newly created bucket. Then, click on the Review policy button. You should see the following screen:
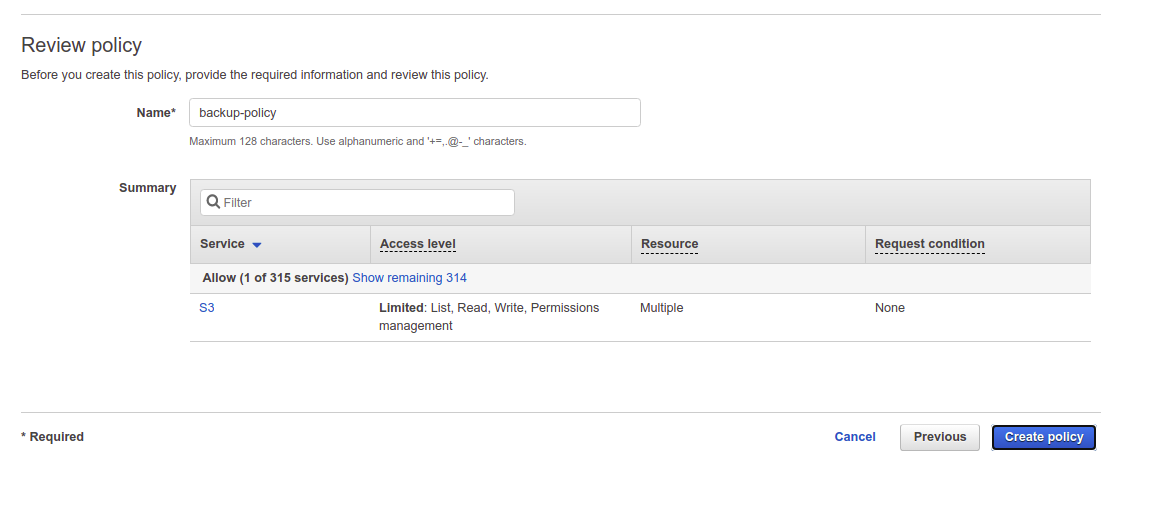
Step 12 - Provide your policy name and click on the Create policy button to save the policy.
Backup Server File to Amazon S3 Manually
In this section, we will show you how to backup server file to Amazon S3 manually using the AWS CLI tool.
Install AWS CLI Tool
Before starting, you will need to install the AWS CLI tool on the server from where you want to backup your file. The AWS CLI is a command-line tool to manage your AWS services. It helps you to control multiple AWS services from the command line and automate them through scripts.
First, download the AWS CLI utility using the command given below:
curl "https://awscli.amazonaws.com/awscli-exe-linux-x86_64.zip" -o "awscliv2.zip"Next, unzip the downloaded file and install it using the following command:
unzip awscliv2.zipsudo ./aws/installAfter the installation, you will need to configure AWS CLI with your AWS credentials.
aws configureProvide your AWS access key ID, secret key, and the region as shown below:
AWS Access Key ID [None]: YOUR-AWS-ACCESS-KEYAWS Secret Access Key [None]: YOUR-AWS-SECRET-KEYDefault region name [None]: us-east-1Default output format [None]:At this point, the AWS CLI tool is configured on the server to control all AWS services.
Backup File to Amazon S3
Now, use the following syntax to backup your server file to the AWS S3:
aws s3 cp [your-file-name] "s3://your-s3-bucket-name"For example, to back up a file named file1.txt to AWS S3, use the following command:
aws s3 cp file1.txt "s3://snapshooter-file-backup"To back up a directory named /etc to AWS, run the following command:
aws s3 sync /etc "s3://snapshooter-file-backup"You can now list all files on the AWS S3 bucket using the following command:
aws s3 ls "s3://snapshooter-file-backup"You will get the following output:
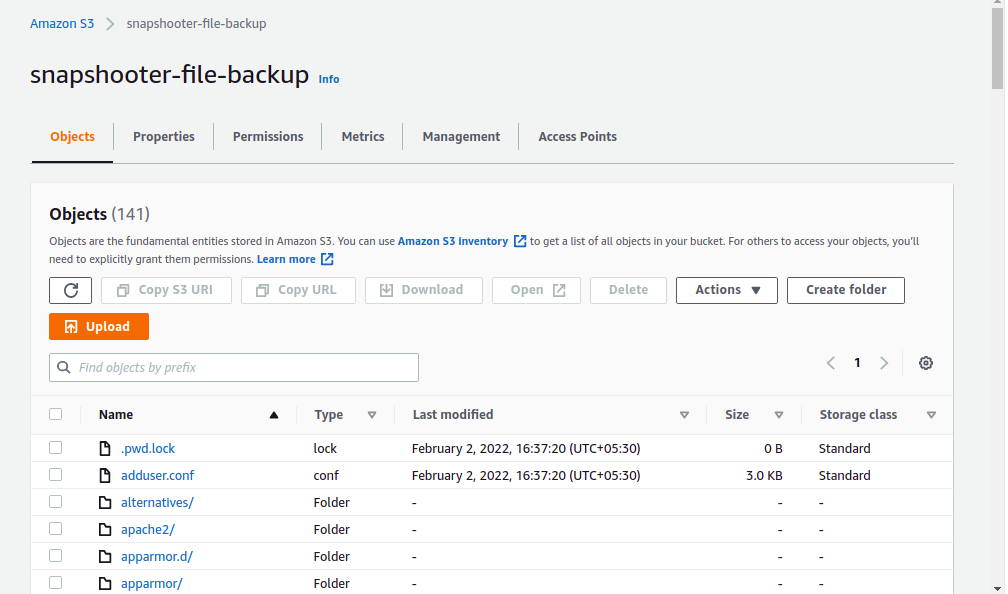
PRE NetworkManager/PRE alternatives/PRE apache2/PRE apparmor.d/PRE apparmor/PRE apt/PRE calendar/PRE console-setup/PRE cron.d/PRE cron.daily/PRE cron.hourly/PRE cron.monthly/PRE cron.weekly/PRE default/PRE depmod.d/PRE dhcp/You can also verify all files by logging in to the Amazon Web Console, searching for S3, and clicking on your bucket name. You should see the following screen:
Use SnapShooter to Backup File to Amazon S3
SnapShooter provides an easier way to create backups and archives from your server and store them on the Amazon S3 bucket. Follow the below steps to backup the server file to the Amazon S3:
Step 1 - On the SnapShooter dashboard, click on the Backup Jobs in the left sidebar. You should see the following screen:

Step 2 - Click on Create New Job. You should see the various backup option on the following screen:
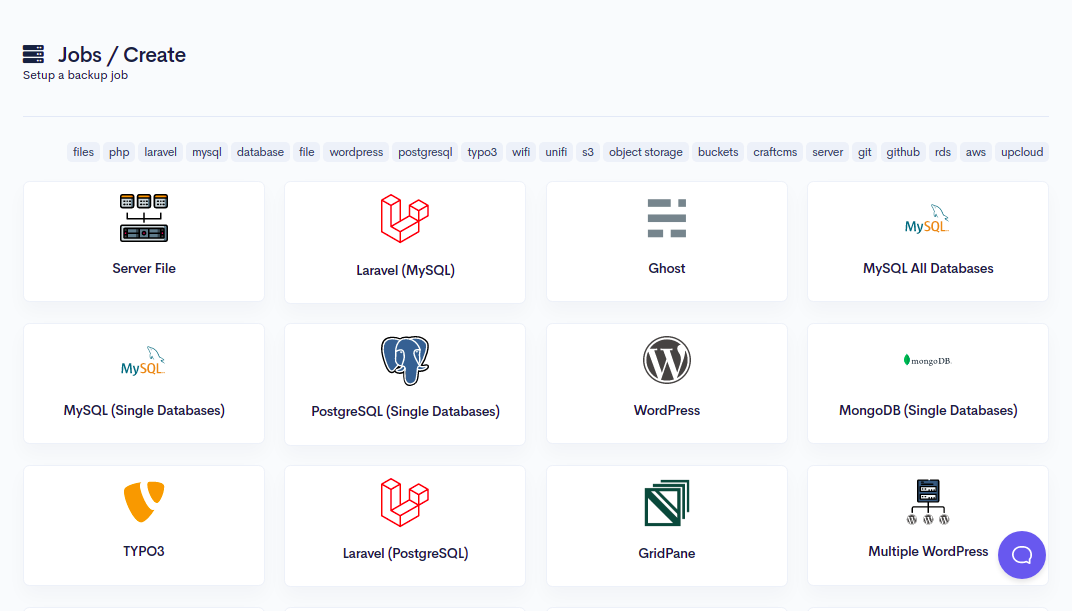
Step 3 - Click on Server File. You should see the following screen:
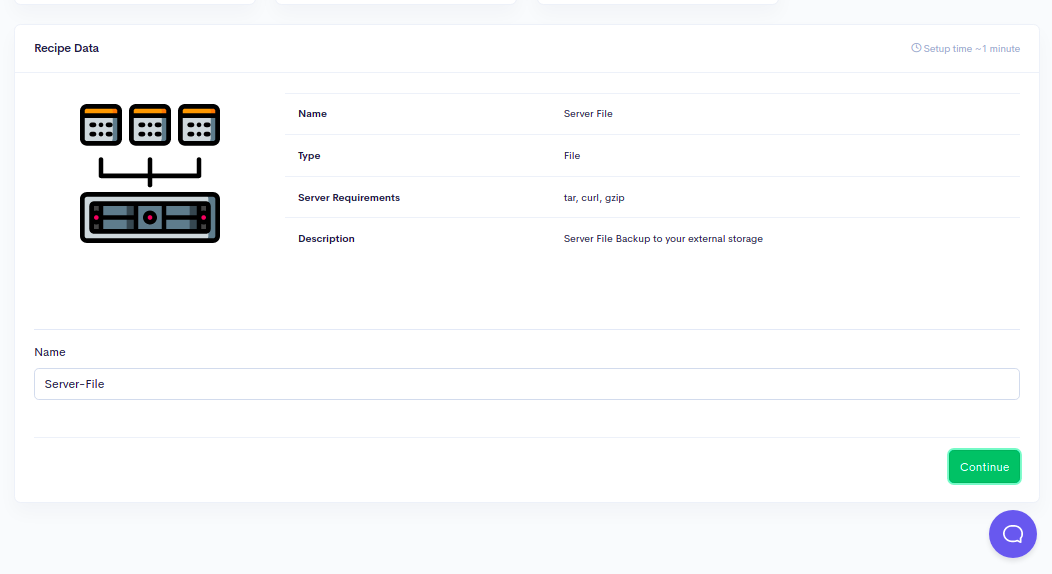
Step 4 - Click on the Continue button. You should see the Add Your Server screen:
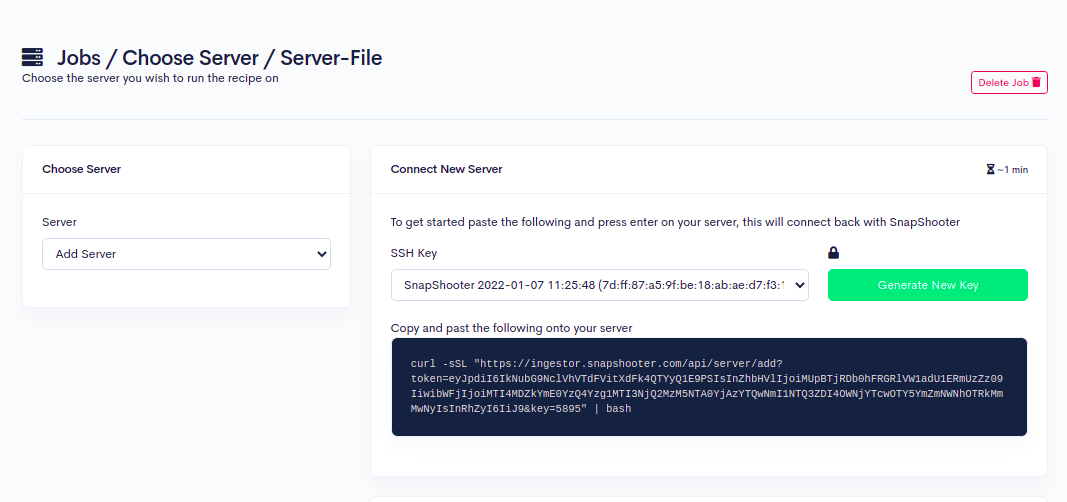
Step 5 - Now, copy the code shown in the above screen and paste it to your server as shown below:
curl -sSL "https://ingestor.snapshooter.com/api/server/add?token=eyJpdiI6IkNubG9NclVhVTdFVitXdFk4QTYyQ1E9PSIsInZhbHVlIjoiMUpBTjRDb0hFRGRlVW1adU1ERmUzZz09IiwibWFjIjoiMTI4MDZkYmE0YzQ4Yzg1MTI3NjQ2MzJHNTA0YjAzYTQwNmI1NTQ3ZDI4OWNjYTcwOTY5YmZmNWNhOTRkMmMwNyIsInRhZyI6IiJ9&key=5895" | bashOnce your server is added to the SnapShooter, you will get the following output:
Welcome to SnapShooter Server SetupEnvironment Detected: OS: linux, OS Type: amd64Installing SSH public keyCreating temp SSH key filegrep: /root/.ssh/authorized_keys: No such file or directorycp: cannot stat '/root/.ssh/authorized_keys': No such file or directoryCreating authorized_keys backup /root/.ssh/authorized_keys.bak-1643800820Key Installed /root/.ssh/authorized_keysRemoving temp SSH key fileScanning SSH configChecking 22matched (22)SSH test confirmed, Server Added to SnapShooter ...Step 6 - Once your server is added to the SnapShooter, you should see the following screen:

Step 7 - Click on the Next button. You should see the file selection screen:
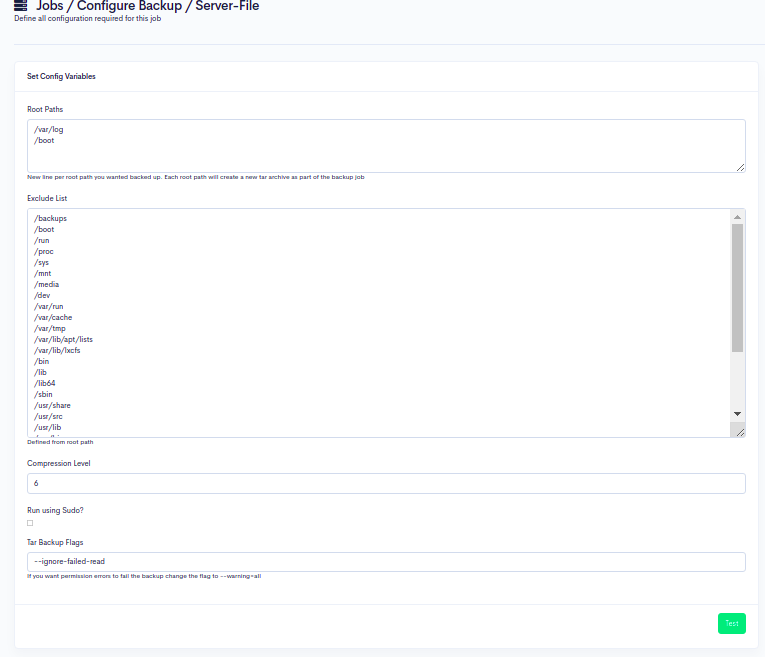
Step 8 - Provide the path of your directory that you want to backup and click on the Test button.
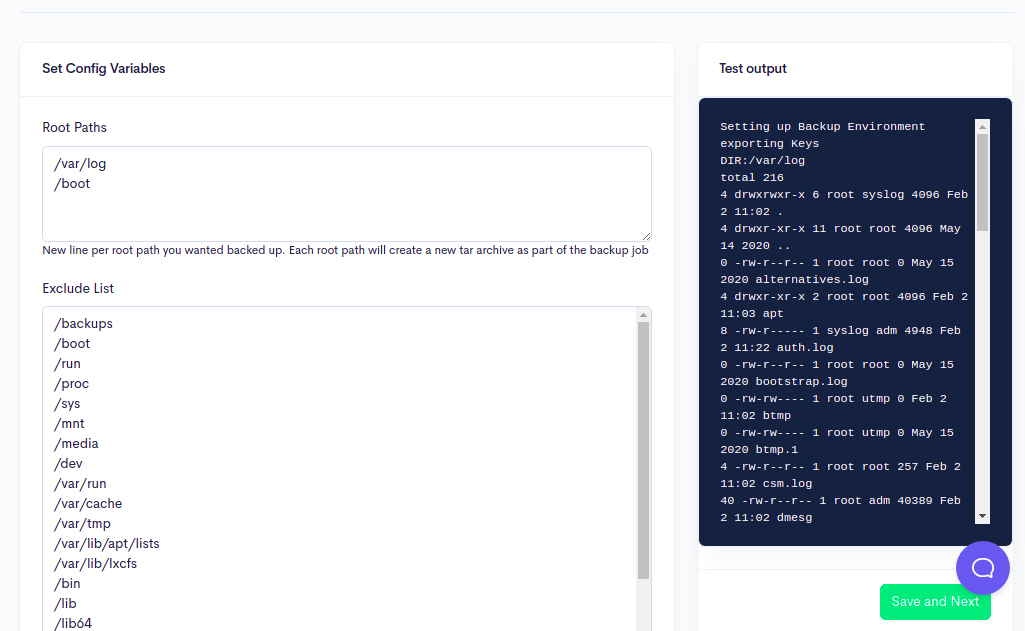
Step 9 - Click on the Save and Next button. You should see the Storage Selection screen:
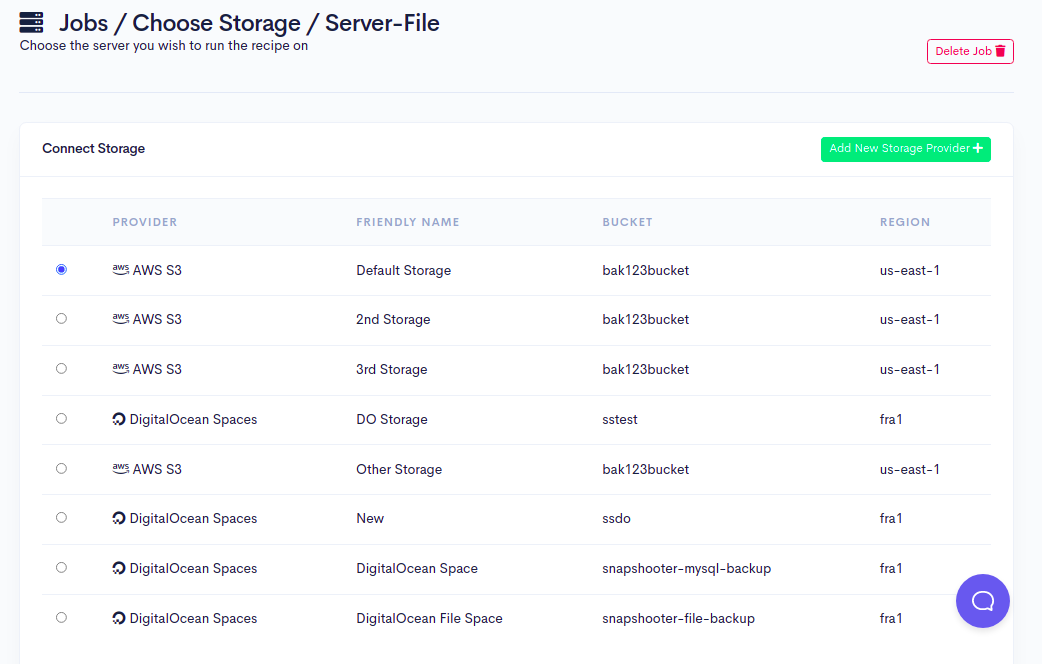
Step 10 - Here, you will need to define your AWS S3 storage to store the file. Click on the Add New Storage Provider. You should see the following screen:

Step 11 - Click on the Config S3 to connect your AWS S3. You should see the following screen:
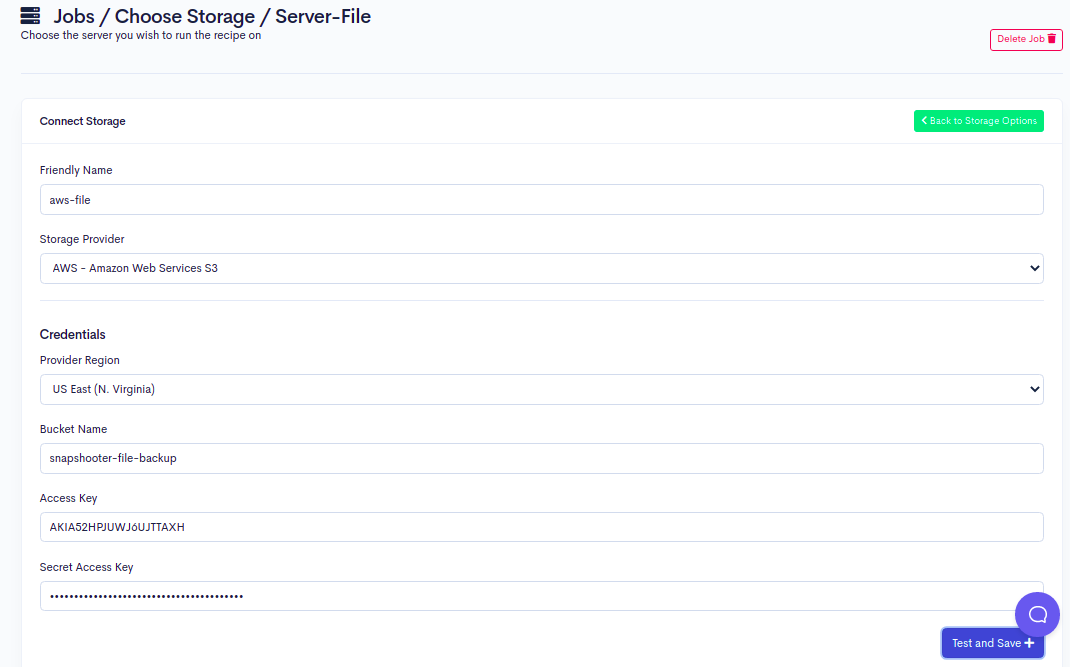
Step 12 - Provide your friendly name, select your storage provider, define your region, provide your S3 bucket name, Access Key, Secret Key and click on the Test and Save button. Once your AWS S3 is connected to the SnapShooter, you should see the following screen:
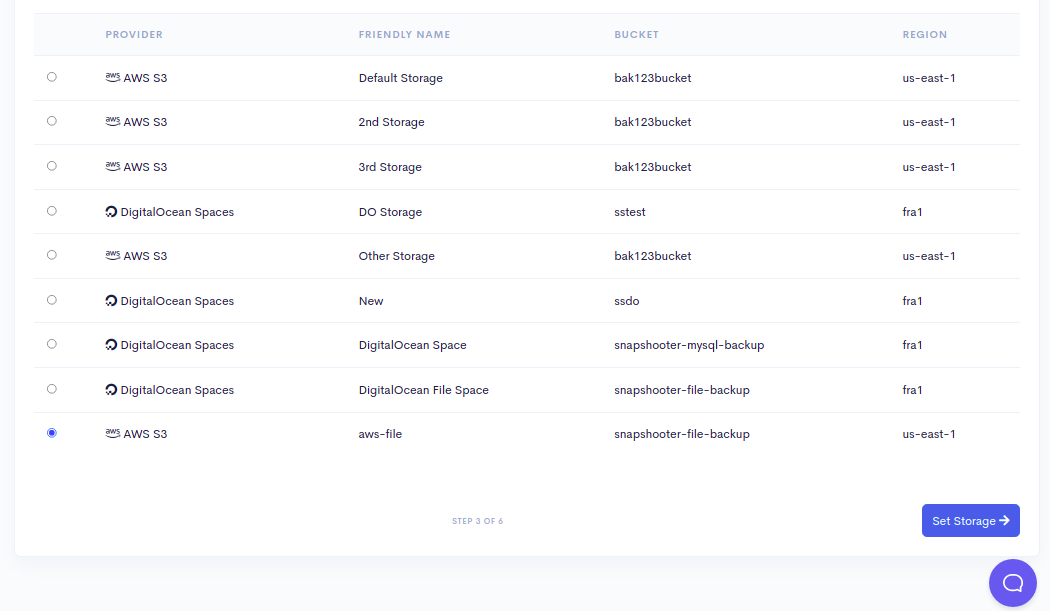
Step 13 - Click on the Set Storage button to set your AWS S3 as default storage. You should see the Backup Schedule Setup screen:
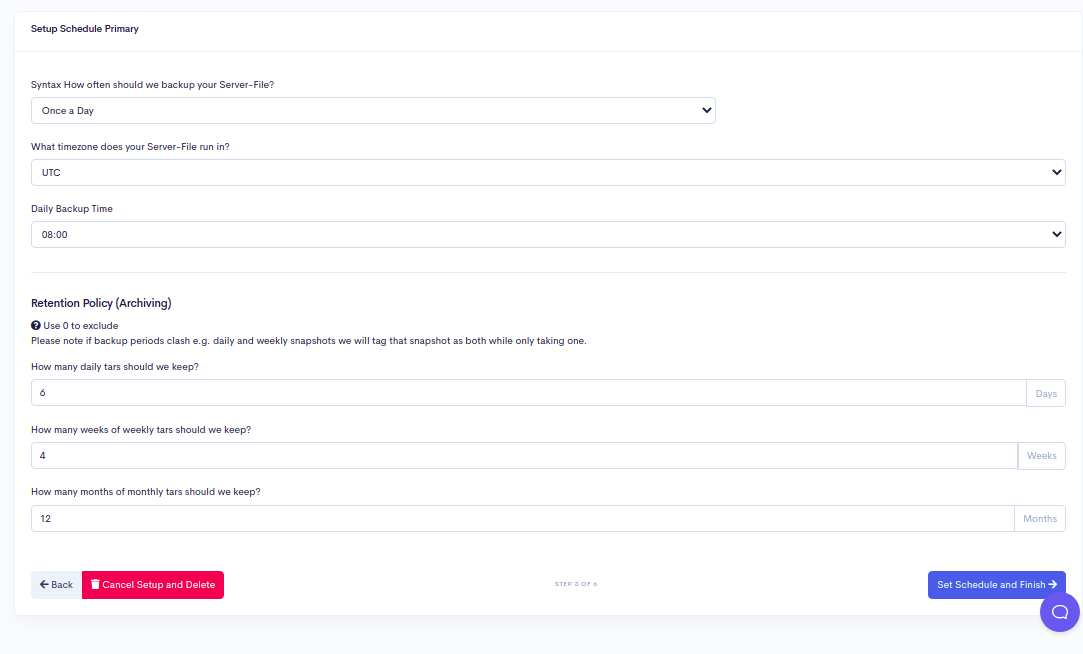
Step 14 - Select and define all options as per your requirements and click on the Set Schedule and Finish button. You should see the following screen:

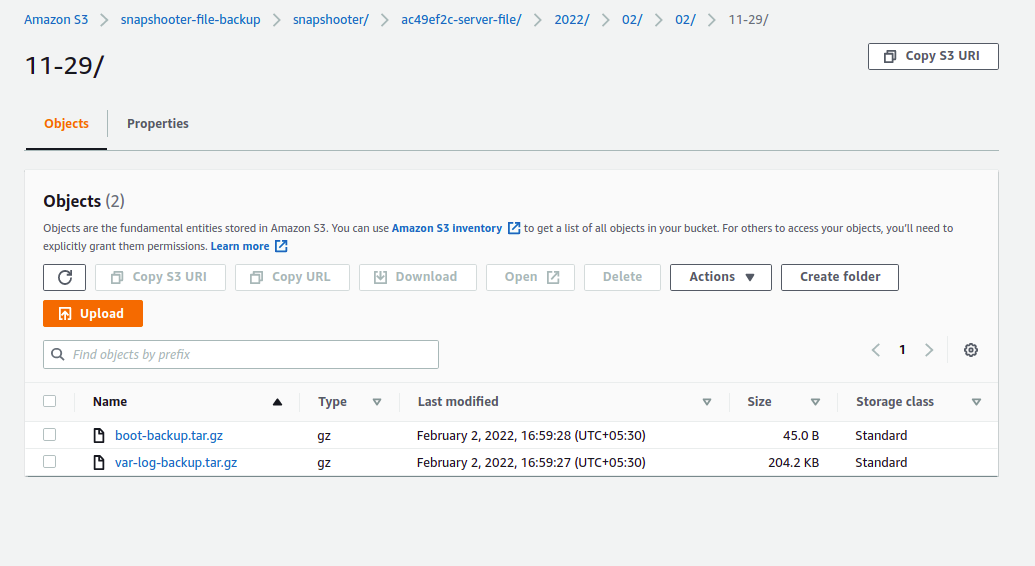
Step 15 - Click on the Backup Now button to run your first backup job. Once your backup job is executed successfully, you should see the following screen:

You can now log in to AWS S3 and verify your backup as shown below:
Conclusion
In the above guide, you learned how to backup server files to Amazon S3 using SnapShooter and manually. I hope you can now use Snapshooter to back up any file and database to Amazon S3.
Thank you for helping us improve!