
How to Backup Laravel to BackBlaze Bucket with Bash
Introduction
Backblaze is an online cloud-based object storage service that allows you to store your data safely and securely. It offers a simple, affordable, and predictable pricing. Storage is $0.005/GB/Month, with download costs of $0.01/GB.
Using SnapShooter, you can easily schedule and automate the Laravel site and database backup to Backblaze Bucket. SnapShooter provides a simple and user-friendly control panel that helps beginners control and manage all their backups. SnapShooter will work with Laravel hosted on your own droplets as well as Laravel-managed databases.
This post will show you how to backup Laravel to Backblaze Bucket manually and using SnapShooter.
Create a Backblaze Bucket
First, you will need to create a new bucket on the Backblaze website. Follow the below steps to create a new bucket on the Backblaze:
Step 1 - Sign in to your Backblaze account and click on the Bucket page to create a new Bucket.

Step 2 - Click on the Create a Bucket button. You should see the following page:
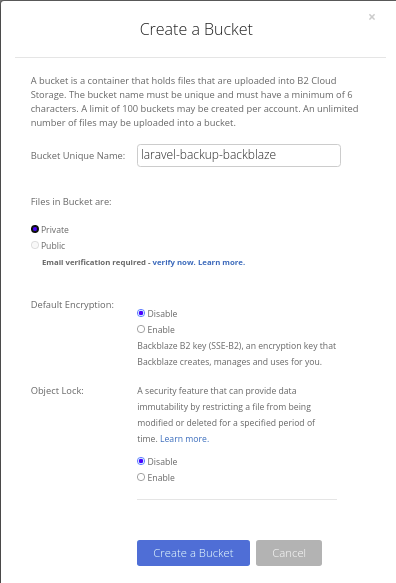
Step 3 - Provide all required information and click on the Create a Bucket button. Once the Bucket is created, you should see the following page:

Note down the Backblaze Endpoint URL from the above image. You will need it later in this article.
Create Your Backblaze Credentials
In order to create backups with Backblaze, you will need to create the credentials required to access it.
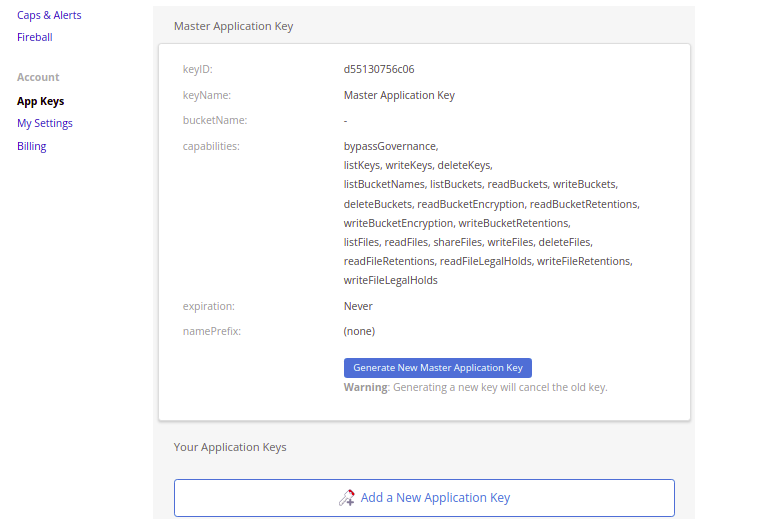
Step 1 - On the Backblaze dashboard, click on the "App Keys" in the left pane as shown below:
Step 2 - Now, click on the "Add a new Application Key" button. You should see the following page:
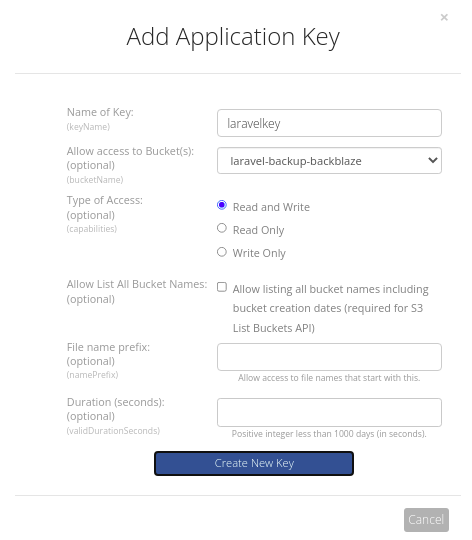
Step 3 - Provide all required details and click on the Create New Key button. You should see the following page:
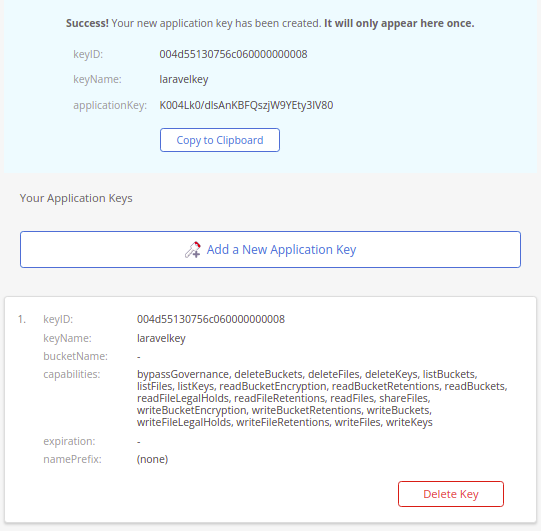
Note down the keyID, and applicationKey from the above image. You will need both to integrate Backblaze with the application.
Backup Laravel to Backblaze Bucket Manually
This section will show you how to back up a Laravel database and site from your server to the Backblaze Bucket using the S3cmd tool.
Install S3cmd
Before starting, you will need to install the S3cmd tool on the Laravel server.
S3cmd is a free and open-source command-line tool that allows you to upload, download and manage data in Backblaze Bucket and other cloud storage service providers. Follow the below steps to install the S3cmd to your server.
First, install the Python and other dependencies by running the following command:
apt-get install python3 python3-setuptools curl -yNext, download the latest version of S3cmd using the following command:
curl -LO https://github.com/s3tools/s3cmd/releases/download/v2.2.0/s3cmd-2.2.0.tar.gzNext, extract the downloaded file with the following command:
tar -xvzf s3cmd-2.2.0.tar.gzNext, navigate to the extracted directory and install it using the following command:
cd s3cmd-2.2.0python3 setup.py installOnce the S3cmd is installed, verify the S3cmd version using the following command:
s3cmd --versionYou will get the following output:
s3cmd version 2.2.0Configure S3cmd to Connect Backblaze Bucket
Next, you will need to configure the S3cmd using the Backblaze Access key and Secret key. You can configure it using the following command:
s3cmd --configureYou will be asked to provide your Backblaze Access Key, Secret Key, Region, and Endpoint as shown below:
Enter new values or accept defaults in brackets with Enter.Refer to user manual for detailed description of all options. Access key and Secret key are your identifiers for Amazon S3. Leave them empty for using the env variables.Access Key: 004d55130756c060000000008Secret Key: K004Lk0/dlsAnKBFQszjW9YEty3IV80Default Region [US]: us-west-004 Use "s3.amazonaws.com" for S3 Endpoint and not modify it to the target Amazon S3.S3 Endpoint [s3.amazonaws.com]: s3.us-west-004.backblazeb2.com Use "%(bucket)s.s3.amazonaws.com" to the target Amazon S3. "%(bucket)s" and "%(location)s" vars can be usedif the target S3 system supports dns based buckets.DNS-style bucket+hostname:port template for accessing a bucket [%(bucket)s.s3.amazonaws.com]: %(bucket)s.s3.us-west-004.backblazeb2.com Encryption password is used to protect your files from readingby unauthorized persons while in transfer to S3Encryption password:Path to GPG program: When using secure HTTPS protocol all communication with Amazon S3servers is protected from 3rd party eavesdropping. This method isslower than plain HTTP, and can only be proxied with Python 2.7 or newerUse HTTPS protocol [Yes]: On some networks all internet access must go through a HTTP proxy.Try setting it here if you can't connect to S3 directlyHTTP Proxy server name: New settings: Access Key: 004d55130756c060000000008 Secret Key: K004Lk0/dlsAnKBFQszjW9YEty3IV80 Default Region: us-west-004 S3 Endpoint: s3.us-west-004.backblazeb2.com DNS-style bucket+hostname:port template for accessing a bucket: %(bucket)s.s3.us-west-004.backblazeb2.com Encryption password: Path to GPG program: None Use HTTPS protocol: True HTTP Proxy server name: HTTP Proxy server port: 0 Test access with supplied credentials? [Y/n] YPlease wait, attempting to list all buckets...Success. Your access key and secret key worked fine :-) Now verifying that encryption works...Not configured. Never mind. Save settings? [y/N] yConfiguration saved to '/root/.s3cfg'Once the S3cmd is configured, you can verify your bucket information using the following command:
s3cmd info s3://laravel-backup-backblaze/You will get the following output:
s3://laravel-backup-backblaze/ (bucket):Location: us-west-004Payer: noneExpiration Rule: nonePolicy: noneCORS: noneACL: d55130756c06: FULL_CONTROLUse S3cmd to Backup Laravel to Backblaze Bucket
At this point, S3cmd is installed and configured to manage the Backblaze.
First, go to the Laravel server from where you want to backup the Laravel. Then, log in to the MySQL using the following command:
mysql -u root -pOnce you are logged in, list all available databases using the following command:
mysql> show databases;You should see all databases in the following output:
+--------------------+| Database |+--------------------+| information_schema || mysql || performance_schema || laraveldb |+--------------------+Next, backup the Laravel database using the following command:
mysqldump -u root -p laraveldb > laraveldb.sqlNext, run the S3cmd command to copy the laraveldb.sql backup file to the BackBlaze:
s3cmd put laraveldb.sql s3://laravel-backup-backblaze/Output:
upload: 'laraveldb.sql' -> 's3://laravel-backup-backblaze/laraveldb.sql' [1 of 1]1048576 of 1048576 100% in 0s 1956.15 KB/s doneNext, run the S3cmd command again to copy the Laravel website data to the BackBlaze:
tar -czvf - /var/www/html/laravel | s3cmd put - s3://laravel-backup-backblaze/laravel.tar.gzOutput:
upload: '<stdin>' -> 's3://laravel-backup-backblaze/laravel.tar.gz' [part 1 of -, 8MB] [1 of 1]8556707 of 8556707 100% in 0s 10.86 MB/s doneYou can now verify all backups on the Backblaze bucket using the following command:
s3cmd ls s3://laravel-backup-backblaze/You will get the following output:
2022-05-25 11:47 8556707 s3://laravel-backup-backblaze/laravel.tar.gz2022-05-25 11:47 1048576 s3://laravel-backup-backblaze/laraveldb.sqlYou can also verify your backup files by logging in to BackBlaze and click on your bucket name. You should see the following screen:

Backup Laravel to Backblaze Using SnapShooter
Manually backing up Laravel to Backblaze is a very time-consuming process. You will need to create and compress back up every time and then upload it to Backblaze manually. You can't control and manage it automatically. In this case, SnapShooter provides an easier way to create a backup, compress it and schedule it automatically for you. Also, SnapShooter provides a web-based control panel to manage all your backup jobs from the web browser.
Add a Server to Snapshooter
First, you will need to add the Laravel server to the Snapshooter. Follow the below steps to add a server to Snapshooter:
Step 1 - First, go to the SnapShooter website and register for their 14-day free trial.
Step 2 - On the SnapShooter dashboard, click on the Servers in the left sidebar. You should see the following screen:
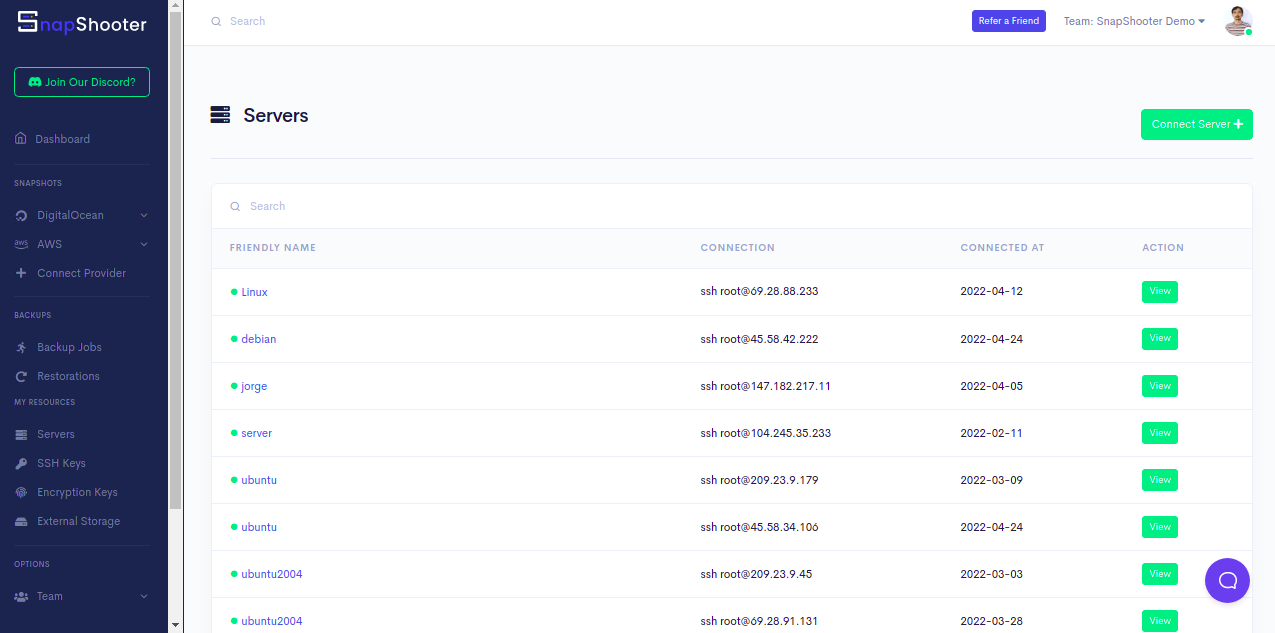
Step 3 - Click on the Connect Server. You should see the following screen:Server. You should see the following screen:
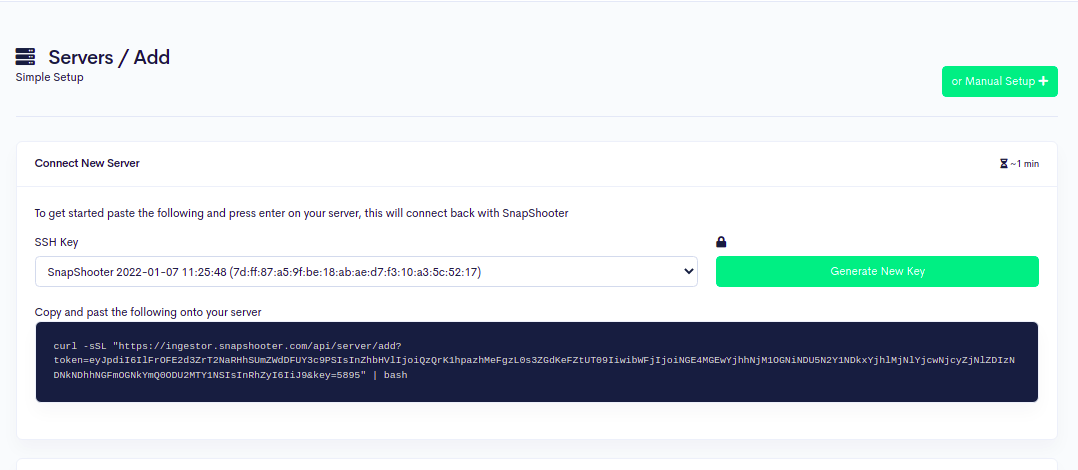
Step 4 - Copy and paste the code shown in the above image to your server:
curl -sSL "https://ingestor.snapshooter.com/api/server/add?token=eyJpdiI6Ilc0b09UbTFMU0VQTm5OQXRWa2c3ckE9PSIsInZhbHVlIjoiK3hOejdBMU1xQmJ4MjJFTlJzUVk4Zz09IiwibWFjIjoiZGVhYmE3MDlhNTNmMjRkNDFhNjYzNzU5YjM2M2VlMzFiYmIwNTY0MTBjMjg5Nzg0ZWRlNGU1NDQzZWRhNjNlNiIsInRhZyI6IiJ9&key=5895" | bashOnce your server is connected to the Snapshooter, you will get the following output:
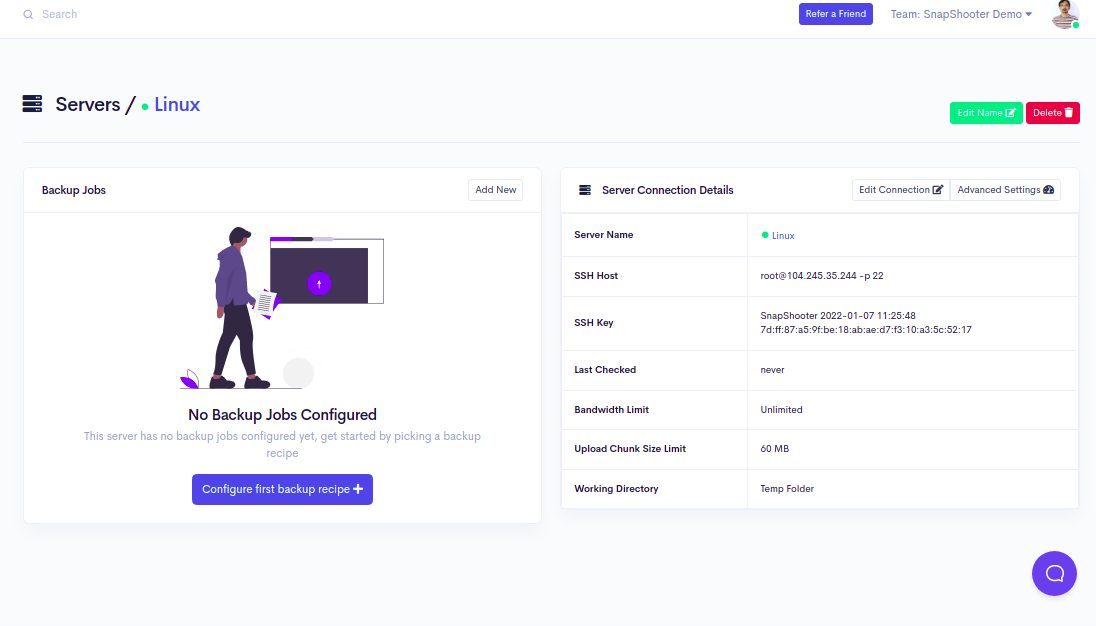
Welcome to SnapShooter Server SetupEnvironment Detected: OS: linux, OS Type: amd64Installing SSH public keyCreating temp SSH key filegrep: /root/.ssh/authorized_keys: No such file or directorycp: cannot stat '/root/.ssh/authorized_keys': No such file or directoryCreating authorized_keys backup /root/.ssh/authorized_keys.bak-1646286944Key Installed /root/.ssh/authorized_keysRemoving temp SSH key fileScanning SSH configChecking 22matched (22)SSH test confirmed, Server Added to SnapShooter ...Step 5 - Go back to your web browser, you should see your added server on the following screen:
Attache BackBlaze to Snapshooter
Next, you will need to attack the external backup storage like BackBlaze to the SnapShooter.
Click here to attach the BackBlaze to SnapShooter. You should see the following screen:
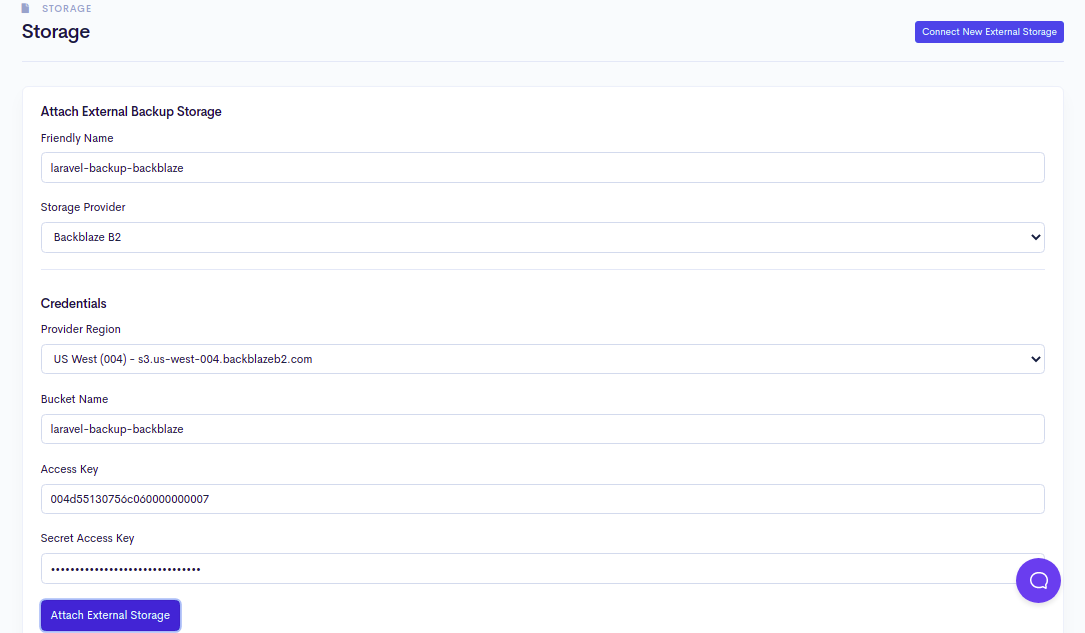
Choose a Friendly Name, Select BackBlaze B2, select region, type your access key and secret access key, type the correct bucket name, then press the Attach External Storage button.
Create a Backup Job to Backup Laravel to BackBlaze
Next, you will need to create a backup job to automate Laravel backup to BackBlaze. Follow the below steps to automate Laravel backup:
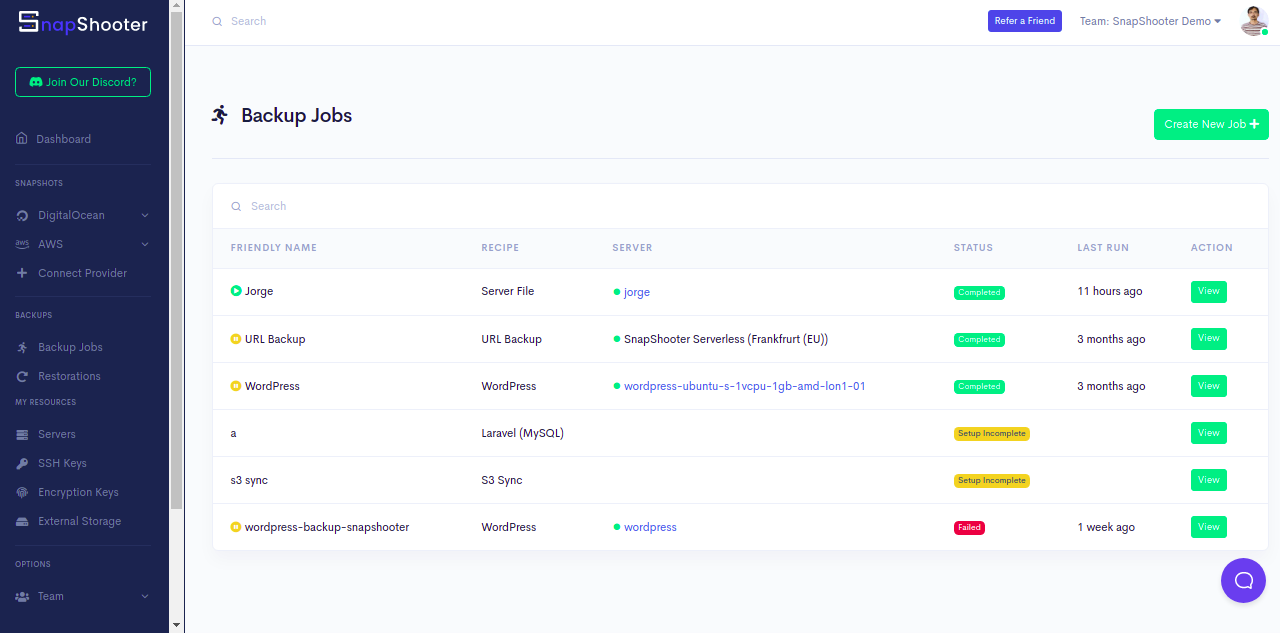
Step 1 - On the SnapShooter dashboard, click on the Backup Jobs in the left pane, you should see the following screen:
Step 2 - Click on the Create New Job. You should see the following screen:

Step 3 - Click on the Laravel. You should see the following screen:

Step 4 - Provide your backup job name and click on the Continue button. You should see the following screen:
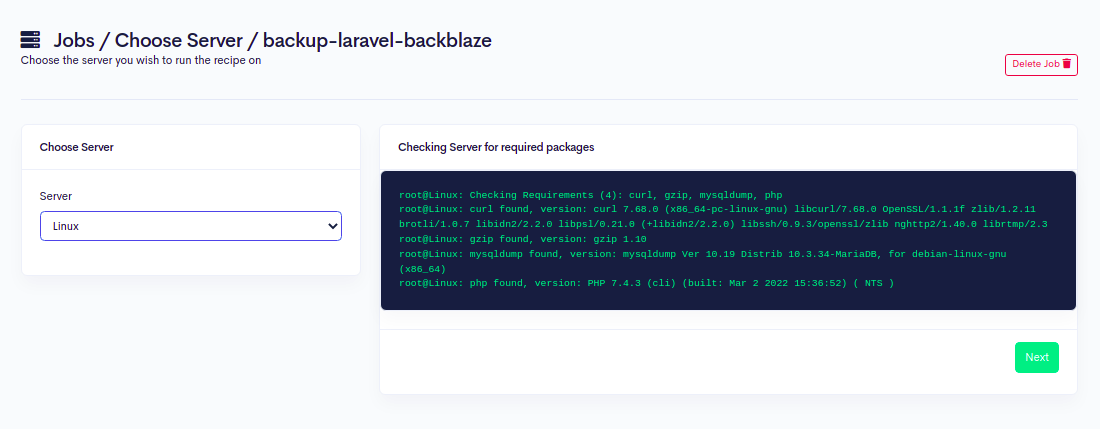
Step 5 - Select your server from where you want to backup Laravel, then click on the Next button. You should see the Laravel configuration screen:
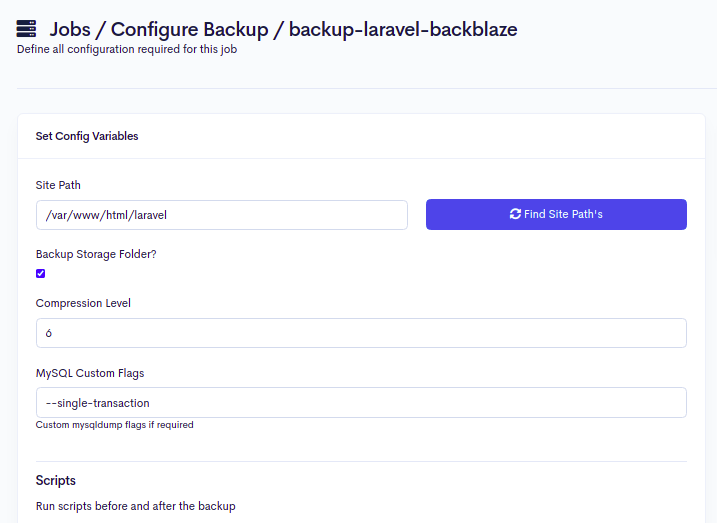

Step 6 - Provide your Laravel root directory path and click on the Test button. You should see the following screen:

Step 7 - Click on the Save and Next button. You will be asked to select the external storage:
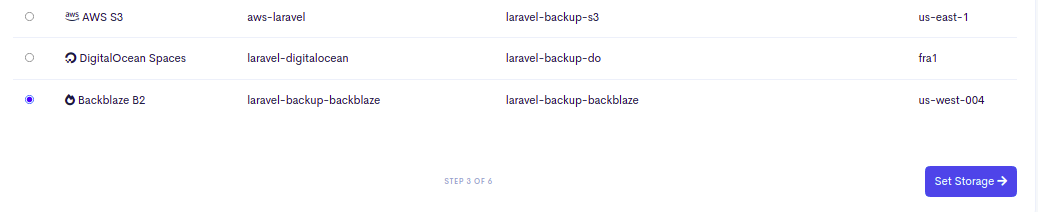
Step 8 - Select your BackBlaze storage and click on the Set Storage button. You should see the backup schedule screen:

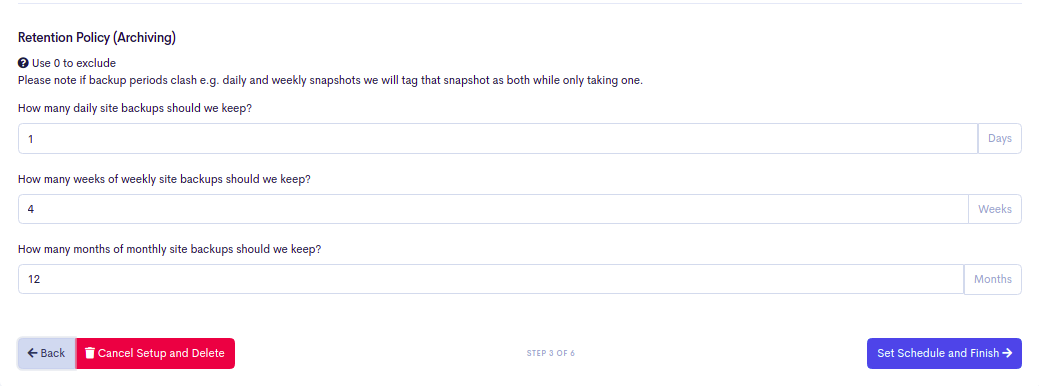
Step 9 - Define your backup schedule, and the retention policy and click on the Set Schedule and Finish button. You should see the following screen:
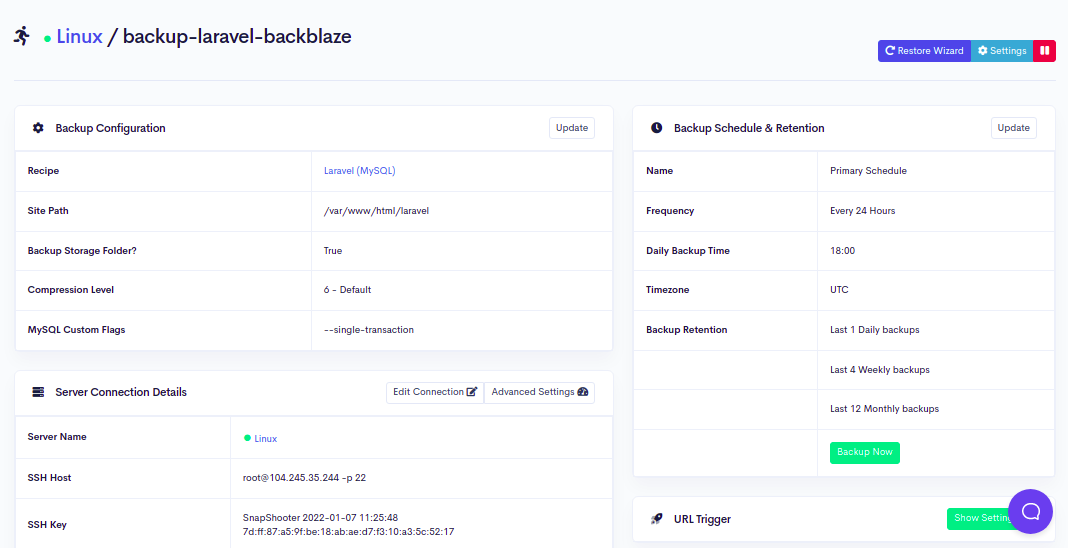
Step 10 - Now, click on the Backup Now button to run your first backup. Once the backup job is executed successfully, you should see the following screen:

You can also verify your backup by accessing BackBlaze. You should see your Laravel backup on the following screen:

Conclusion
This guide taught you how to backup Laravel to BackBlaze using SnapShooter and manually. You can now manage and control all your backup from the centralized location.
Thank you for helping us improve!