
How to Backup MongoDB Database to Amazon S3
Introduction
Amazon S3 is a cloud object storage service provided by Amazon Web Services that provides object storage through a web service interface and API. It allows you to store any amount of data at any time.
Manually backing up a MongoDB database from your own server is a very hard and time-consuming process for any system administrator. In this case, SnapShooter provides an easier way to backup your MongoDB database to Amazon S3. It supports many cloud providers including, Amazon AWS, Google Cloud, Vultr, DropBox, Hetzner, UpCloud, and more.
In this guide, we will show you how to backup the MongoDB database to Amazon S3.
Create an S3 Bucket in AWS
Before you can store any object or data in S3, you need to create a bucket on AWS S3. Follow the below steps to create a bucket on AWS S3:
Step 1 - Login to Amazon Management Console, search for S3 and open the S3 service.
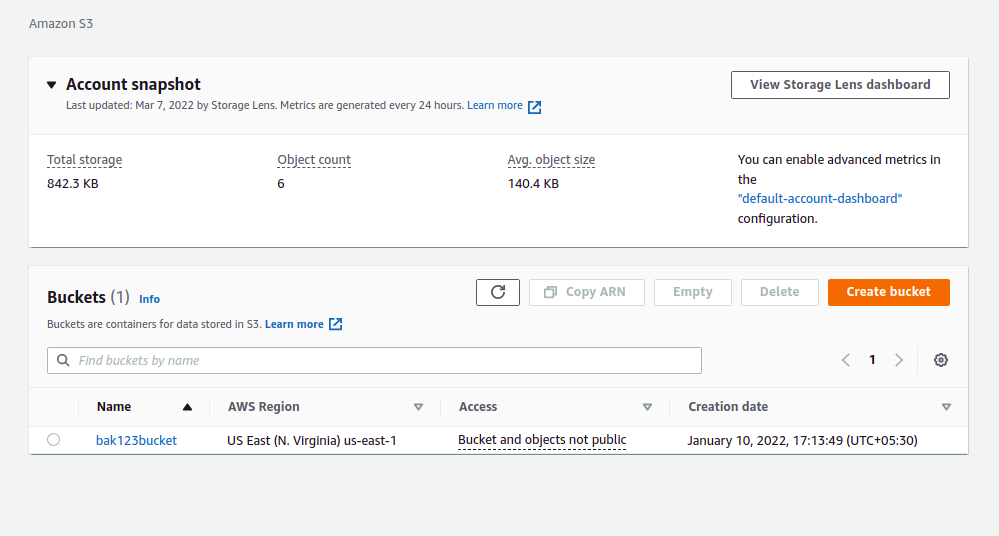
Step 2 - Click on Create bucket button. You should see the General configuration screen:


Step 3 - Type your bucket name, select your region, Select object ownership, Block all public access, and click on the Create bucket. Once the bucket is created, you will get the following screen:
Create a New IAM User
After creating an S3 bucket, you will need to create a new IAM user and assign permission for your S3 bucket. Follow the below steps to create an IAM user:
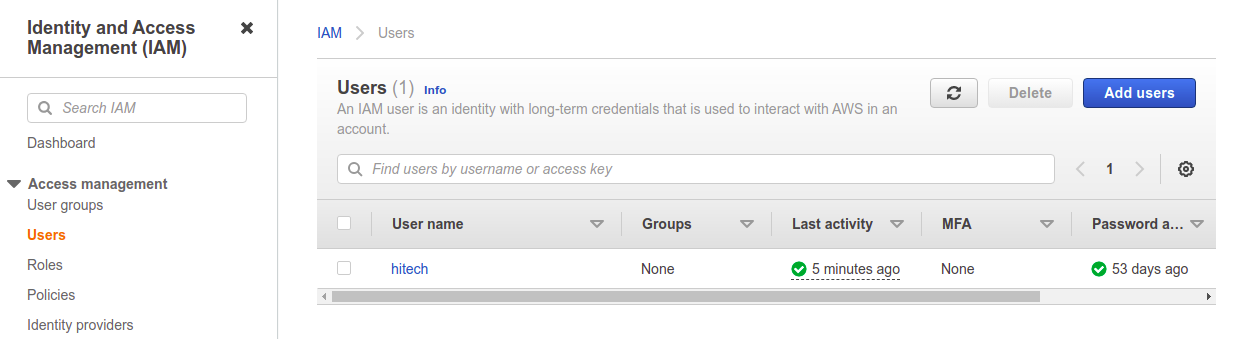
Step 1 - Log in to Amazon Management Console, search for IAM from the top services menu, and click on Users on the left sidebar. You should see the IAM user screen:
Step 2 - Click on the Add users button to create a new IAM user. You should see the following screen:

Step 3 - Type your username, select "Access Type Programmatic access", then click on the Next: Permissions:
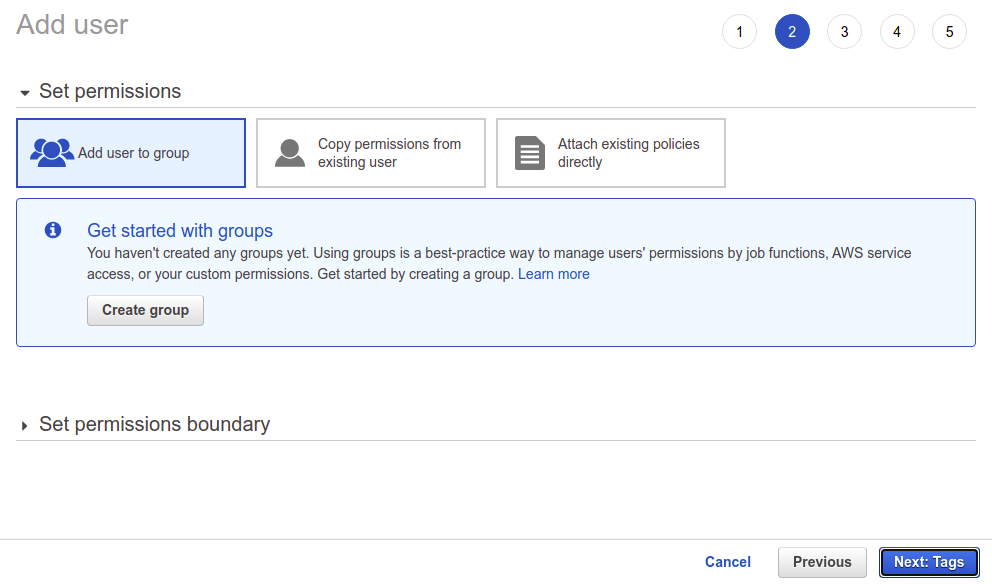
Step 4 - Leave all default options and click on the Next: Tags:

Step 5 - Leave all default options and click on the Next: Review:

Step 6 - Review your configuration and click on the Create user button. You should see the following screen:
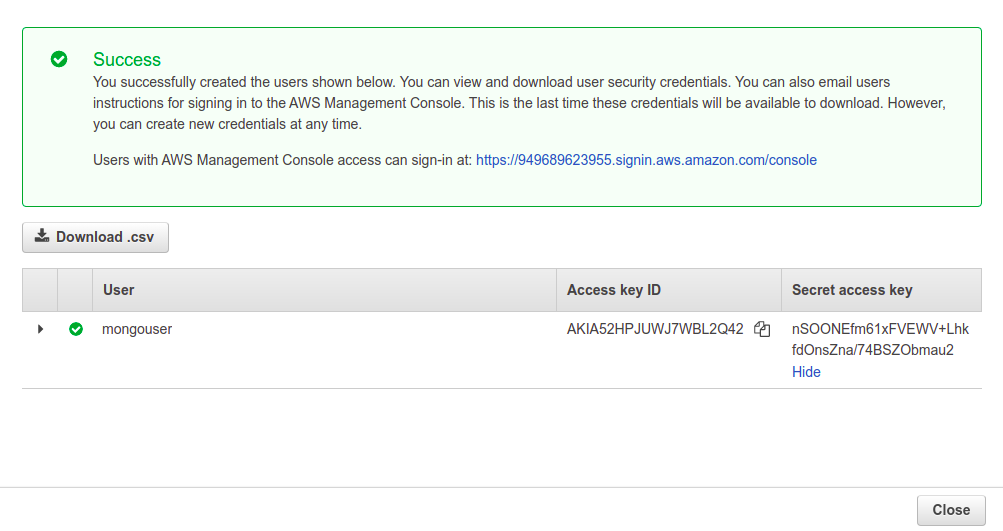
Step 7 - Note down the Access key ID and Secret access key in a safe location. You will need both keys to connect to the AWS S3 in the next step. Now, click on the Close button. You should see the following screen:

Step 8 - Click on your newly created user. You should see the following screen:

Step 9 - Click on Add inline policy. You should see the Create Policy screen:
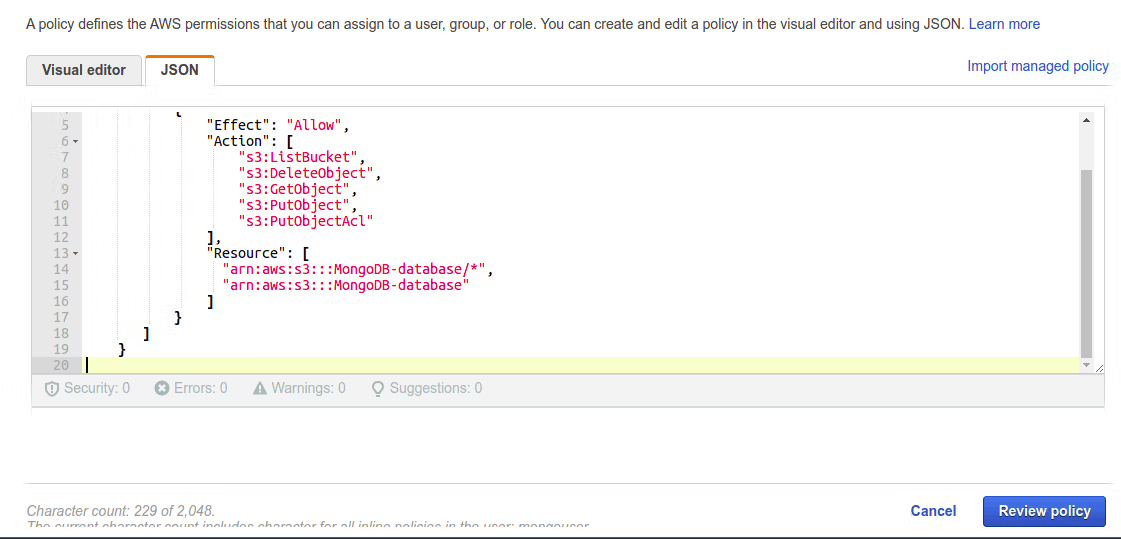
Step 10 - Choose JSON Editor and add the following contents:
{ "Version": "2012-10-17", "Statement": [ { "Effect": "Allow", "Action": [ "s3:ListBucket", "s3:DeleteObject", "s3:GetObject", "s3:PutObject", "s3:PutObjectAcl" ], "Resource": [ "arn:aws:s3:::mongodb-database/*", "arn:aws:s3:::mongodb-database" ] } ]}Step 11 - Replace the mongodb-database with the newly created bucket. Then, click on the Review policy button. You should see the following screen:
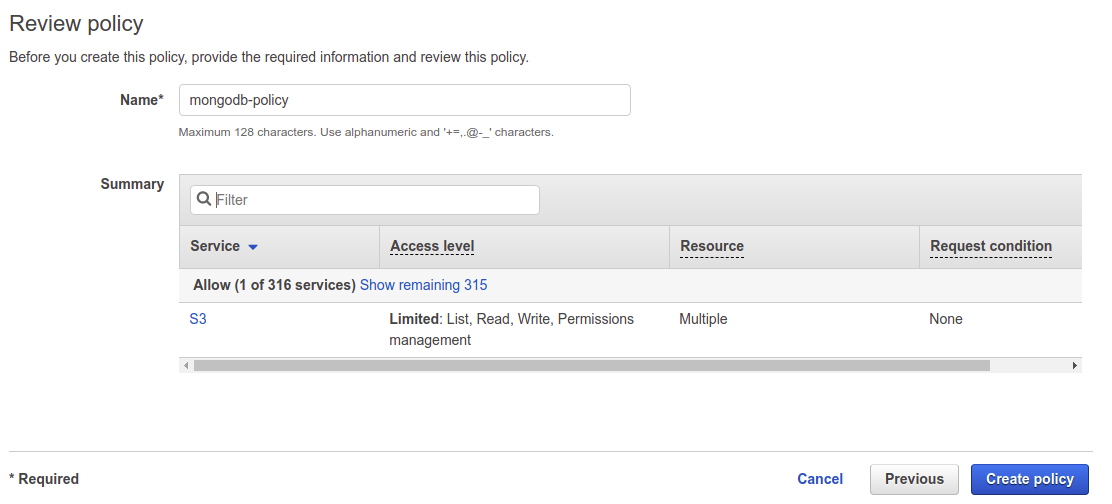
Step 12 - Provide your policy name and click on the Create policy button to save the policy.
Backup MongoDB Database to Amazon S3 Manually
In this section, we will show you how to backup the MongoDB database to Amazon S3 manually using the AWS CLI tool.
Install AWS CLI Tool
Before starting, you will need to install the AWS CLI tool on the MongoDB server from where you want to backup your databases. The AWS CLI is a command-line tool to manage your AWS services. It helps you to control multiple AWS services from the command line and automate them through scripts.
First, download the AWS CLI utility using the command given below:
curl "https://awscli.amazonaws.com/awscli-exe-linux-x86_64.zip" -o "awscliv2.zip"Next, unzip the downloaded file and install it using the following command:
unzip awscliv2.zipsudo ./aws/installAfter the installation, you will need to configure AWS CLI with your AWS credentials.
aws configureProvide your AWS access key ID, secret key, and region as shown below:
AWS Access Key ID [None]: YOUR-AWS-ACCESS-KEYAWS Secret Access Key [None]: YOUR-AWS-SECRET-KEYDefault region name [None]: us-east-1Default output format [None]:At this point, the AWS CLI tool is configured on the server to control all AWS services.
First, log in to the server from where you want to backup your MongoDB database. First, log in to your server and connect to the MongoDB shell with the following command:
mongoOnce you are log in, list all available databases using the following command:
show dbsYou will get the following output:
admin 0.000GBconfig 0.000GBlocal 0.000GBtestdb 0.000GBNext, backup the testdb database inside the /opt directory using the following command:
mongodump --db testdb --out /opt/To back up all MongoDB databases, run the following command:
mongodump --out /optNext, verify all backup databases using the following command:
ls /optYou will get the following output:
admin testdbAfter backing up your desired databases, you will need to copy the database backup file to the AWS S3. Use the following syntax to copy a MongoDB database to AWS S3:
aws s3 cp [your-db-name] "s3://your-s3-bucket-name"For example, to back up a MongoDB database named testdb to AWS S3, use the following command:
aws s3 sync /opt/testdb "s3://mongodb-database"To back up all MongoDB databases named admin to AWS S3, use the following command:
aws s3 sync /opt/admin "s3://mongodb-database"You can now list all databases on the AWS S3 bucket using the following command:
aws s3 ls "s3://mongodb-database"You will get the following output:
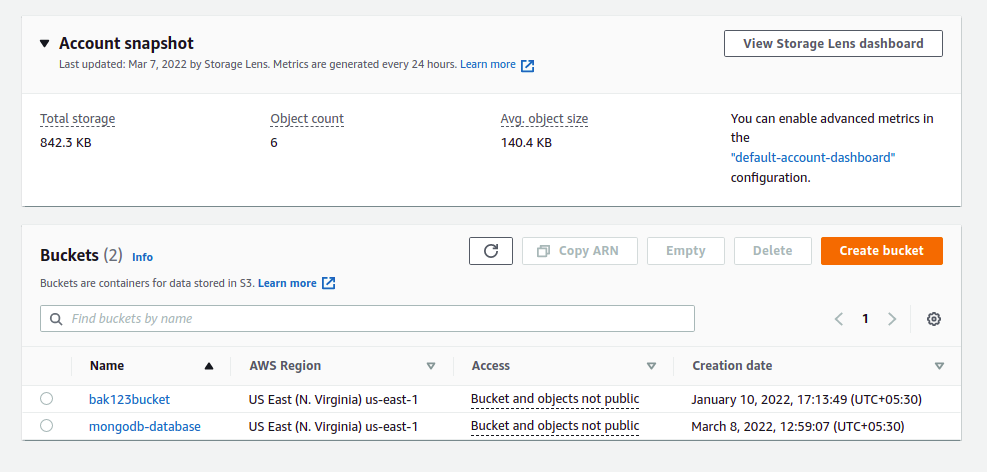
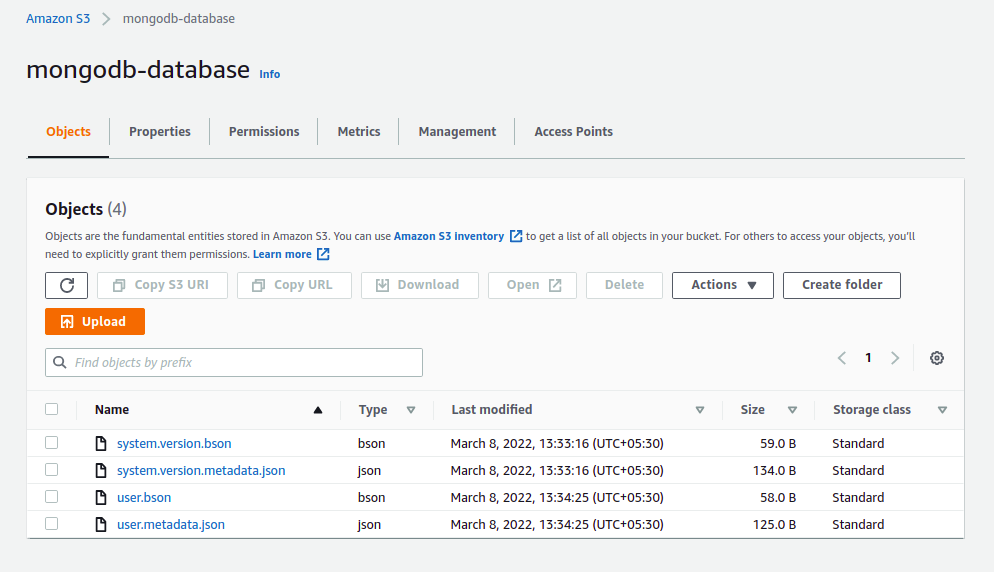
2022-03-08 08:03:16 59 system.version.bson2022-03-08 08:03:16 134 system.version.metadata.json2022-03-08 08:04:25 58 user.bson2022-03-08 08:04:25 125 user.metadata.jsonYou can also verify all databases by logging in to the Amazon Web Console, search for S3 and click on your bucket name. You should see the following screen:
Scheduled MongoDB (Single Databases) Backups SnapShooter
Backup a single MongoDB database to your external storage
Learn more about MongoDB (Single Databases) Backups
Get started for free
Conclusion
In this guide, you learned how to backup the MongoDB database to AWS S3 using SnapShooter and manually. You can now manage and control all your backup from the centralized location.
Related
Thank you for helping us improve!